The Challenge
The occasion was a new partner at a chiropractic office who needed to have location photos taken. These needed to match the existing motif for the office’s website. This can be a challenge. For starters, the original photographer and I may not approach photography the same way, let alone the questions as to how types of gear and ways of “seeing” impact results. Nearly 4 decades of experience can be an excellent resource to call upon.
I’m a big believer in location scouting whenever possible, even down to the same time of day to see the effects of the ambient light. By getting the lay of the land I may spot potential challenges in executing the assignment. It’s a much more efficient way to work on location, and makes it far more likely I’ll have everything necessary to complete the assignment to the client’s satisfaction. When this location was scouted, it was a bright and sunny early November day with 70 degree temperatures – fully NOT the usual for the time of year. By the day of the assignment, normalcy had returned. It had rained heavily all morning and was incredibly dark and dreary. All the gorgeous light flooding in through the windows the day of the scout was nonexistent, but that look of beautiful ambient light was still required.
Flashpoint/Godox lighting to the rescue!
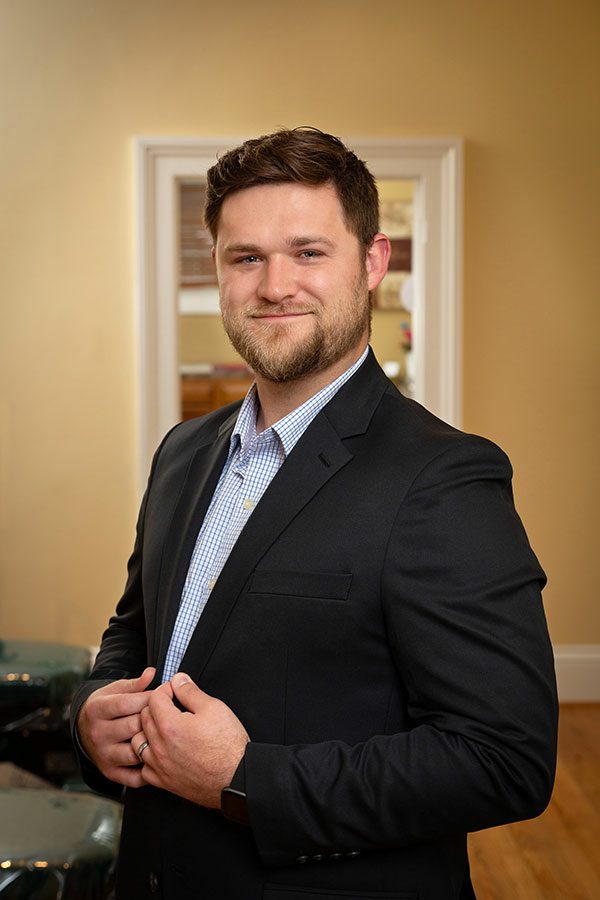
Because I had seen the effect of window light on the rooms when sunny, I knew additional lights would be needed to recreate what nature had since removed. I already knew I’d use the 31” Glow Lantern as the main, whether it was sunny or not. This would be on an AD600, hand metered and set at 1/8 + .3 power. Not only does the lantern light the subject beautifully with a pleasing shadow gradient, it also spreads a soft natural fill all around, reducing the need for additional lights and reflectors to be brought into an establishment; a real inconvenience in some spaces.
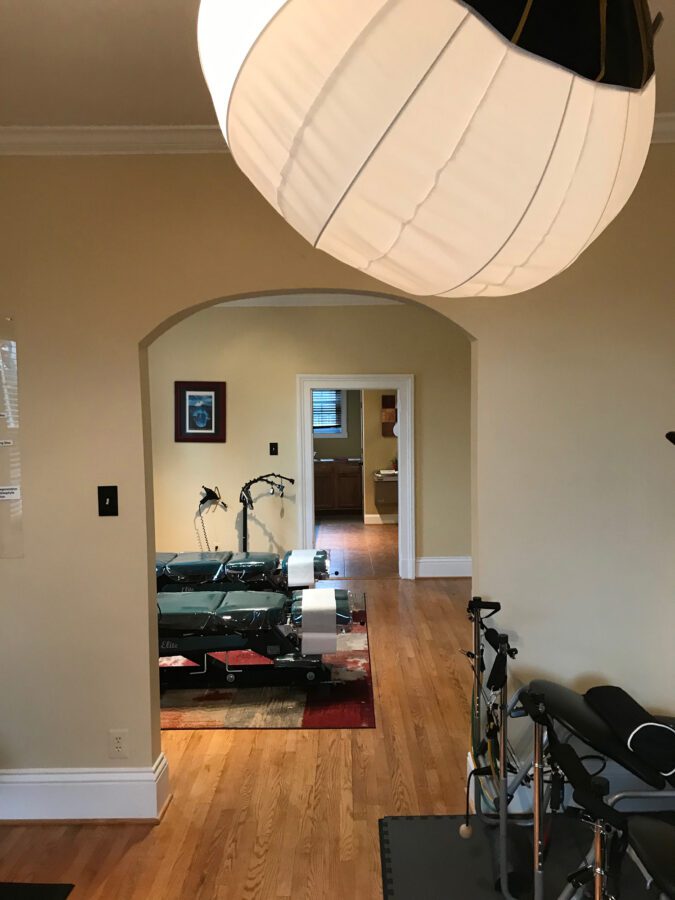
Because the subject would be standing in the archway between two rooms, the light from the Lantern main would be cut off by the wall and not reach the second room. A second light would be needed to emulate the daylight that would not be flooding the room. For this I used an AD200 with the bare bulb head and the reflector cone with the diffuser on the front, set about 5’ high at 1/2 power and bounced up into the corner of wall and ceiling above the windows, or about 10’ high.

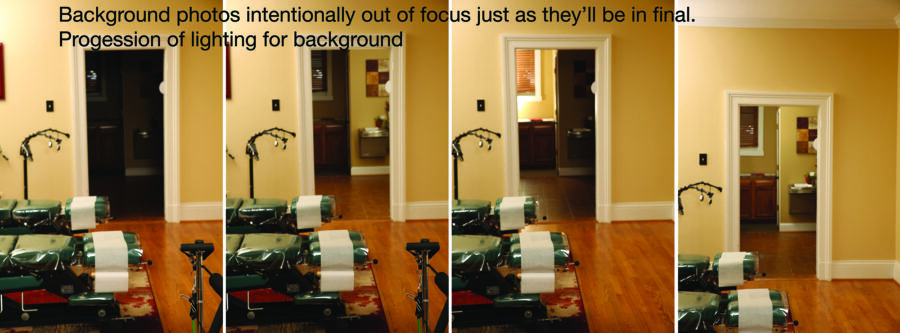
Finally, there was a third room – a small reception area beyond the second room, dark as a tomb at normal exposure times without bright sunlight. For this room, a second AD200 was placed on the reception counter, standing on end and aimed straight up, also at 1/2 power. To help spread the light within the room, I used a MagMod Sphere. A few test shots were required to avoid annoying shadows, but once those were complete, I could see that the look of natural light I had been asked simulate was well and simply done. All that was left was to bring in the new doctor and proceed.
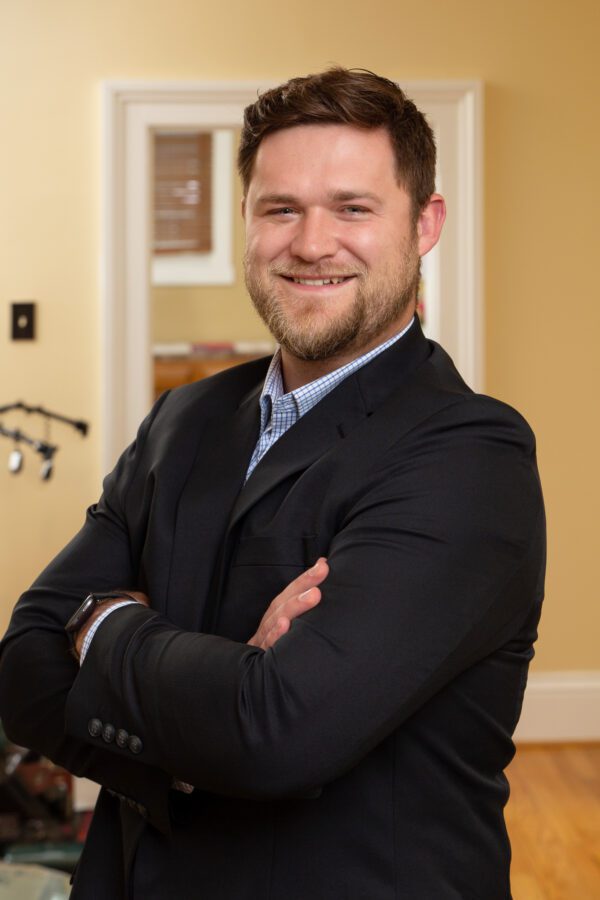
Canon 5D MKIII on tripod, Tamron 24-70 G2 lens at 70mm, f4.0, ISO 100 1/50 second to gather some ambient light.
When you need to put your best foot forward, call Jeff Behm Photography 724-730-8513 or email jeff@jeffbehm.com Nearly 4 decades of professional experience focused on your needs